Skip to content

The software

From design brief to G-code

LuthierXpert is worked through from top to bottom, in the order you build a guitar. The solver line stays at the bottom of the screen from one section to the next. The screenshots follow the same guitar from start to finish. The first section, the Gallery, is on the home page.

Design brief

The solver, before anything else

You set the scale length, the number of frets and strings, the joint, the bridge, the pickups and the electronics. The solver works out the rest and shows it at the bottom of the screen: neck length, widths at nut and heel, headstock and neck angles, pocket depth, bridge clearance.

As long as everything holds together, the status bar reads SOLVER · COHERENT. If a dimension makes the instrument unplayable, a warning appears with the value to correct.

  • The Expert box unlocks the dimensions the solver works out on its own.
  • The references are drawn on the plan: nut, joint at the 16th fret, neck end at the 22nd.
  • Knobs, switch and jack start on automatic. You can change them.
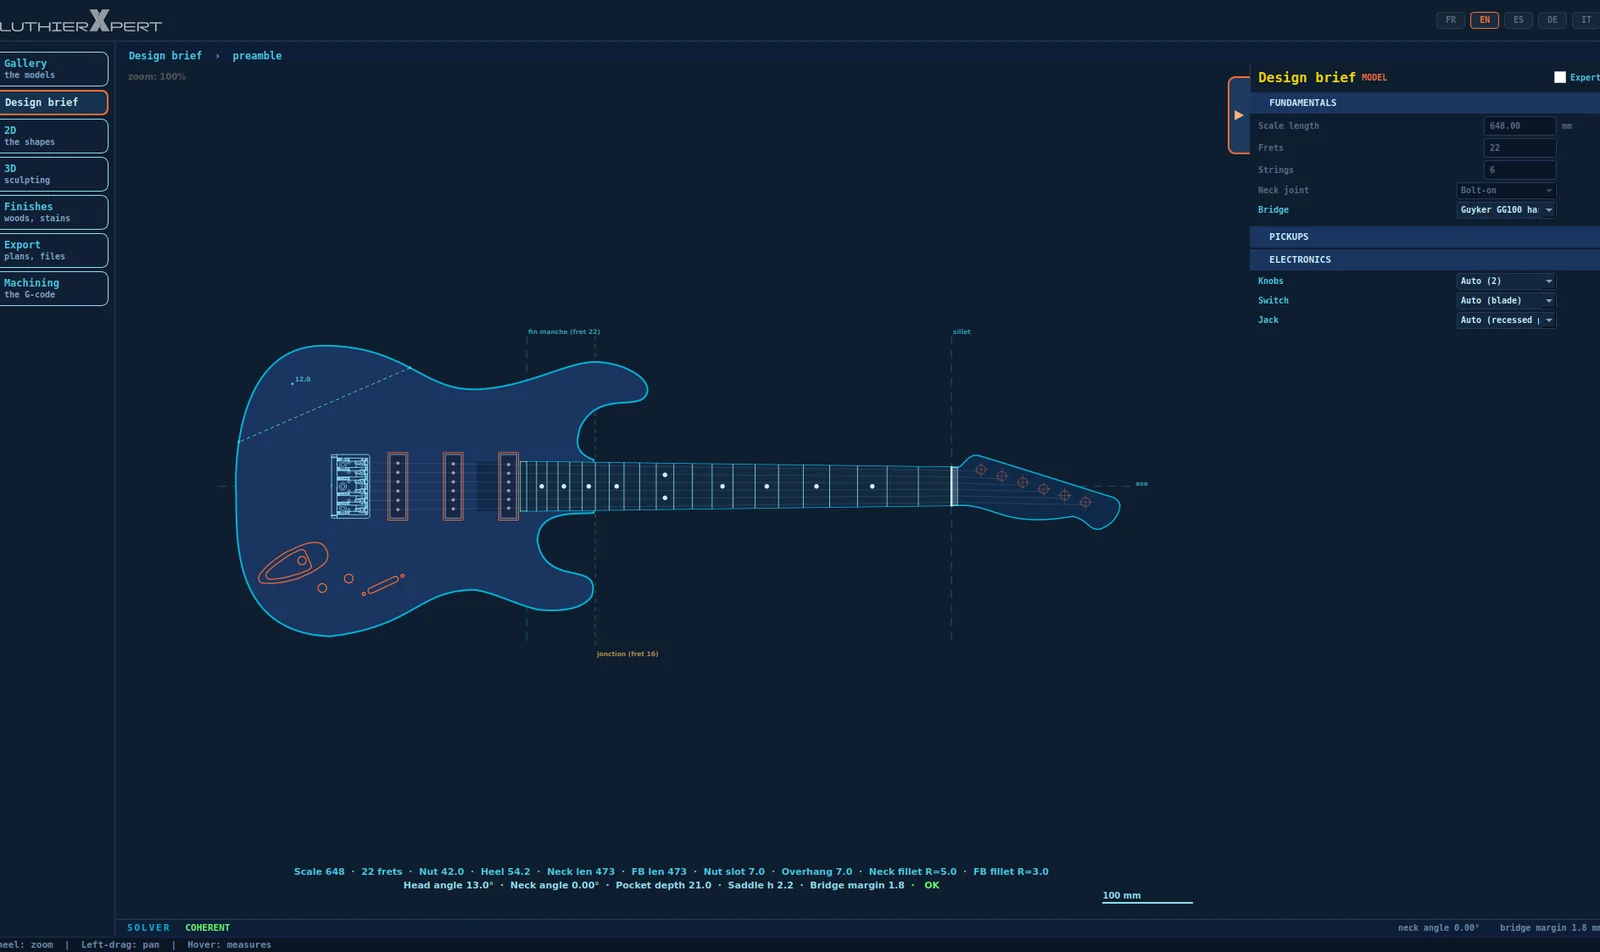
The design brief: the fundamentals on the right, the dimensioned plan in the centre and the solver line at the bottom of the screen.
Scale 648 · 22 frets · Nut 42.0 · Heel 54.2 · Neck length 473 · Pocket depth 21.0 · Bridge clearance 1.8… and at the end of the line: OK.

2D — the shapes

You draw, the dimensions follow

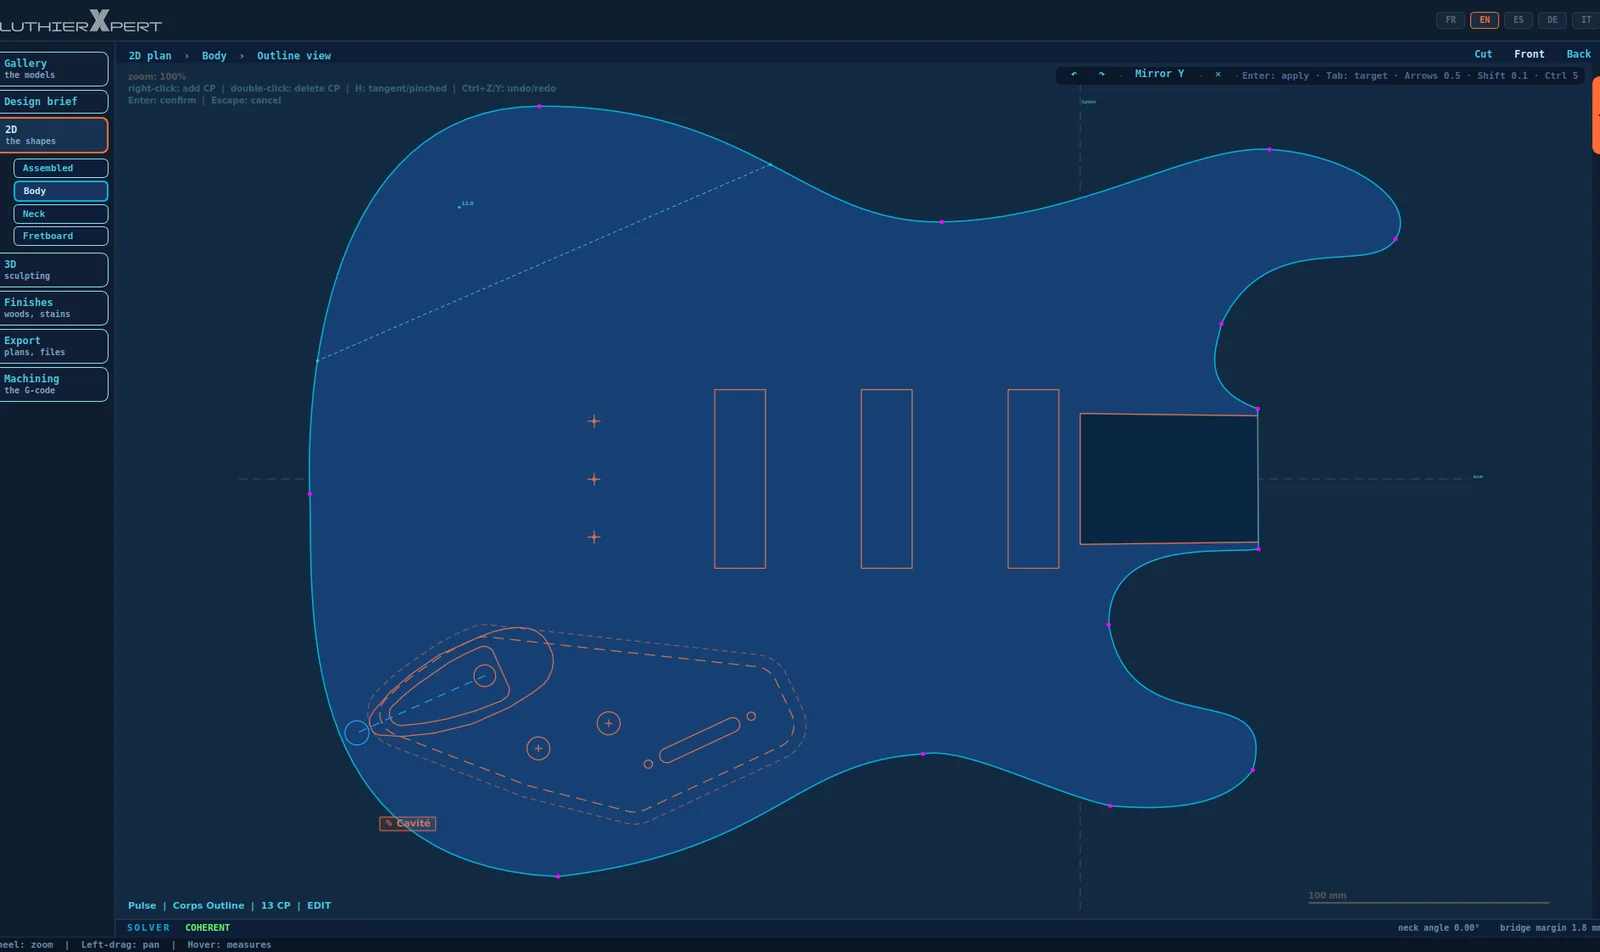
Body, neck and fretboard each have their own outline in Bézier curves. Right-click adds a point, double-click removes it. The H key switches between a smooth curve and a corner.

Pickup cavities, the neck pocket and the drillings come from the design brief. They move with it: three single coils, three cavities.

  • Front, back or section view.
  • Ctrl+Z and Ctrl+Y to undo and redo. Enter confirms, Esc abandons.
  • A graduated scale stays on screen. You draw in millimetres.
The body outline being edited, with its control points, the cavities and the neck pocket.
The body being edited: thirteen control points, the cavities and the neck pocket.

3D — the carving

Carve top, bevel, fillet, volute

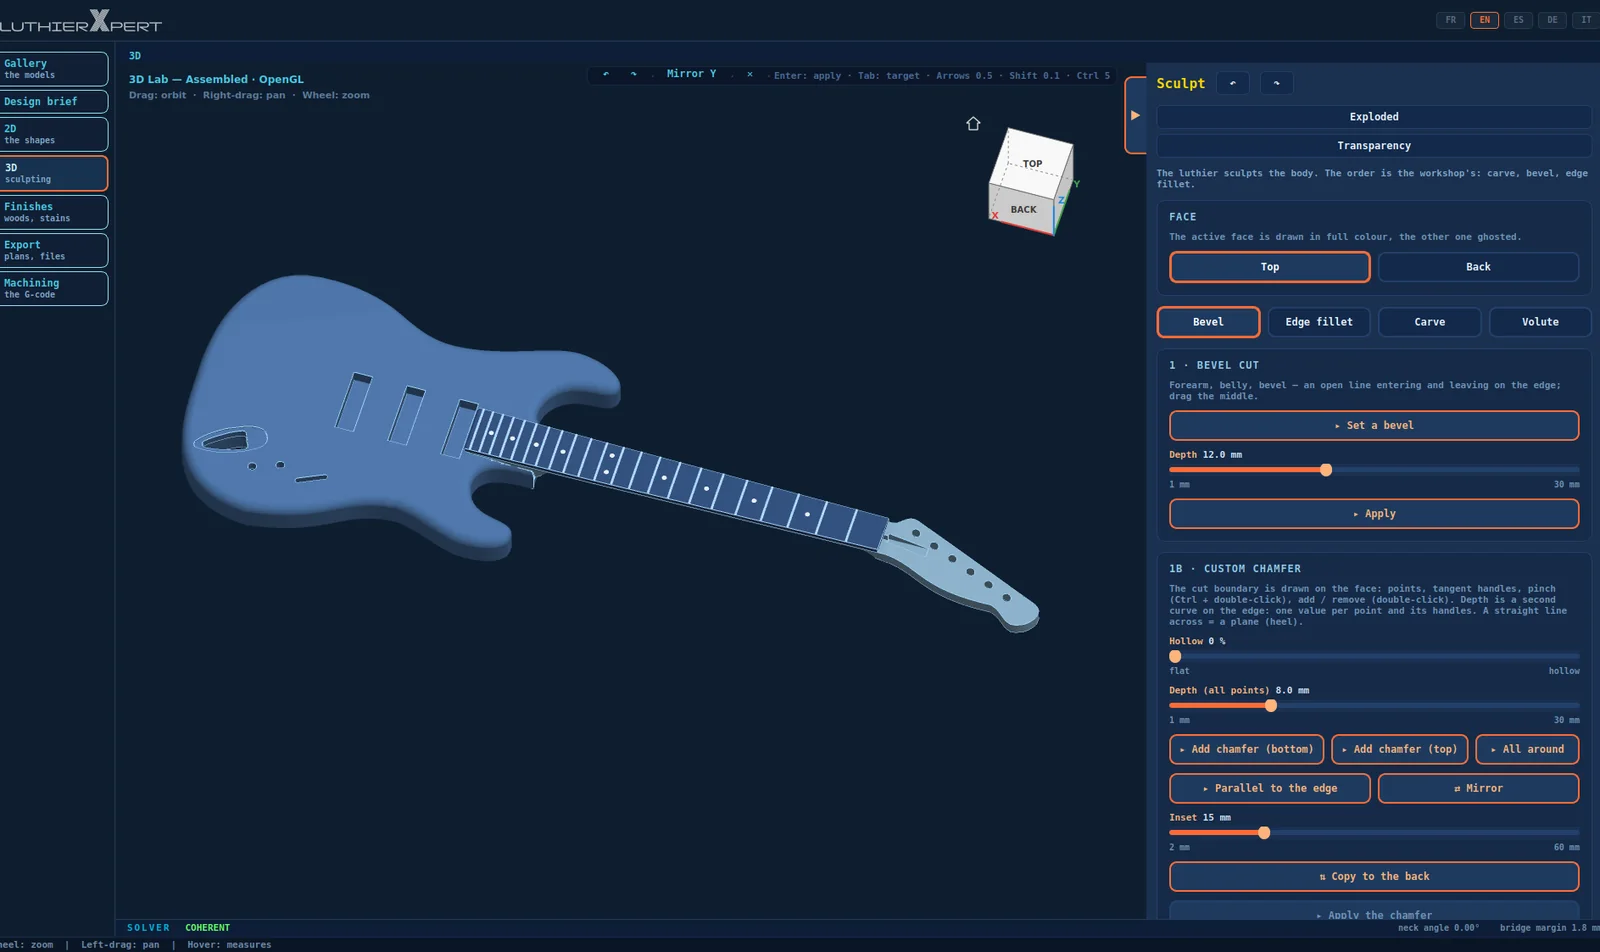
The Carve panel brings together the carve top, the bevel, the fillet and the volute. You pick the face, top or back, and lay the cut onto the part. The other face stays visible in transparency.

The custom chamfer is drawn point by point on the face. Its depth is set point by point too. A straight line across it gives a heel.

  • Exploded view and transparency mode.
  • Bevel from 1 to 30 mm deep.
  • All the way round, symmetry, copy to back: the chamfer is carried over in one click.
The 3D Lab: the assembled guitar in solid rendering and the Carve panel.
The Carve panel: bevel, fillet, carve top, volute, and the custom chamfer.

Finishes — timber, stains

The wood, the grain and the weight

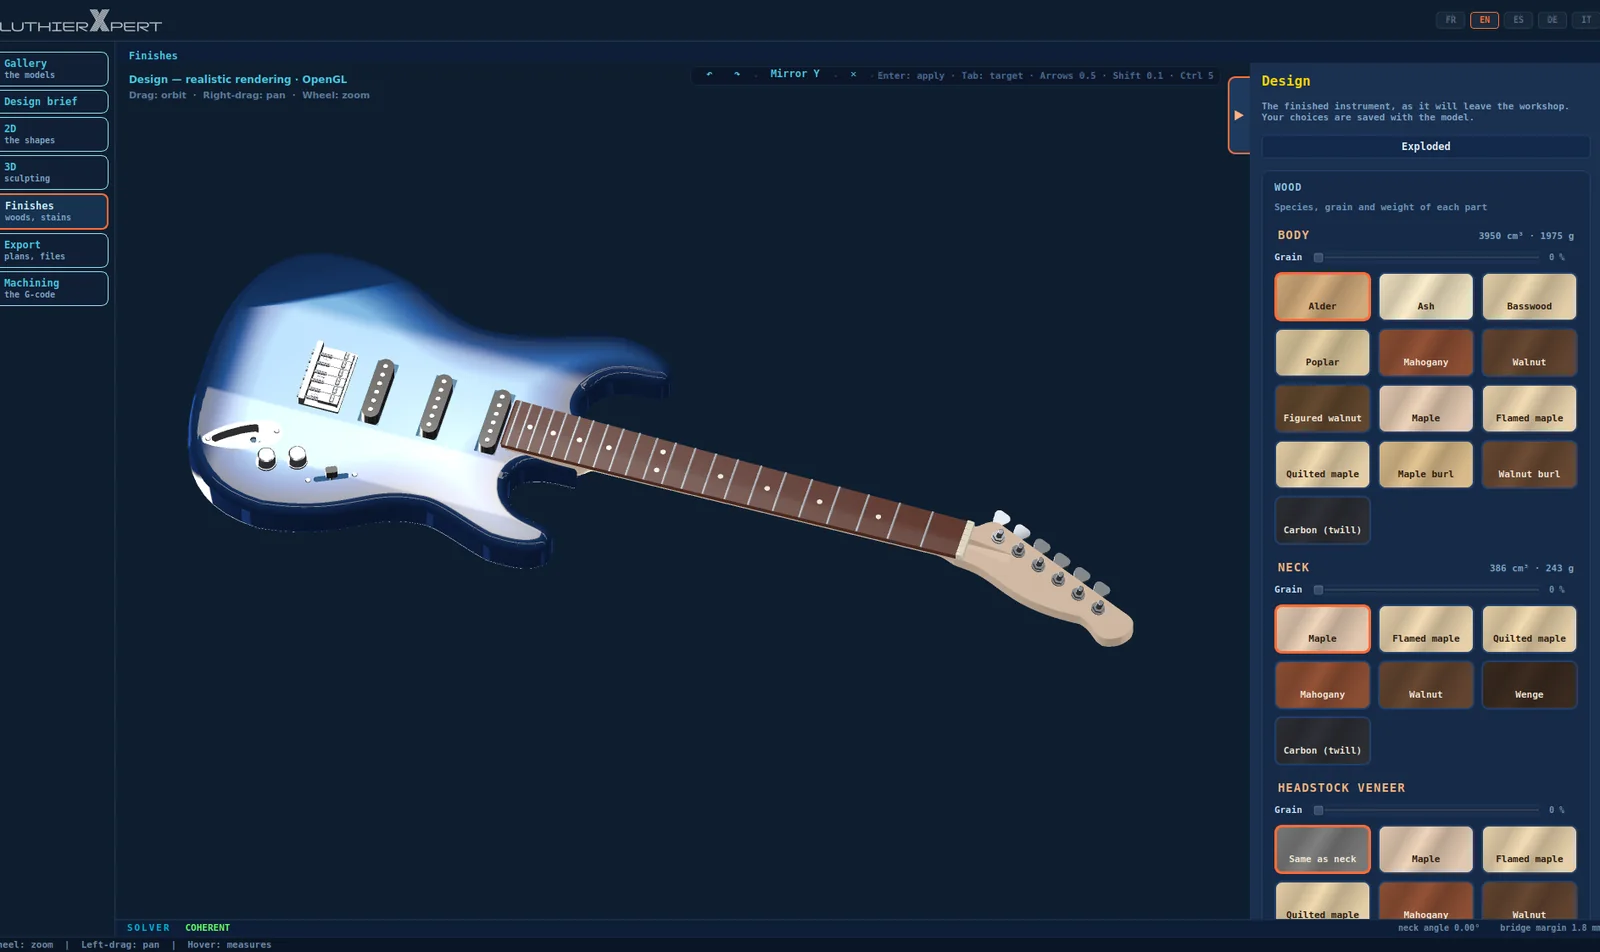
Each part gets its own timber. Alder, ash, mahogany, flamed or quilted maple, walnut burl: the swatches hold about a dozen, plus twill carbon. The headstock veneer is chosen separately.

The software shows the volume and mass of each part. On this guitar, 1975 g for the alder body, 243 g for the neck, 121 g for the fretboard. Change the timber and the mass follows.

  • Realistic rendering. Drag to orbit, wheel to zoom.
  • Stains and gradients, from natural to sunburst.
  • Your choices are saved with the model.
The Finishes page: the guitar in realistic rendering and the timber swatches, with the volume and mass of each part.
Body 3950 cm³ · 1975 g: the mass of each part, depending on the timber chosen.

Export — plans, files

What leaves the workshop

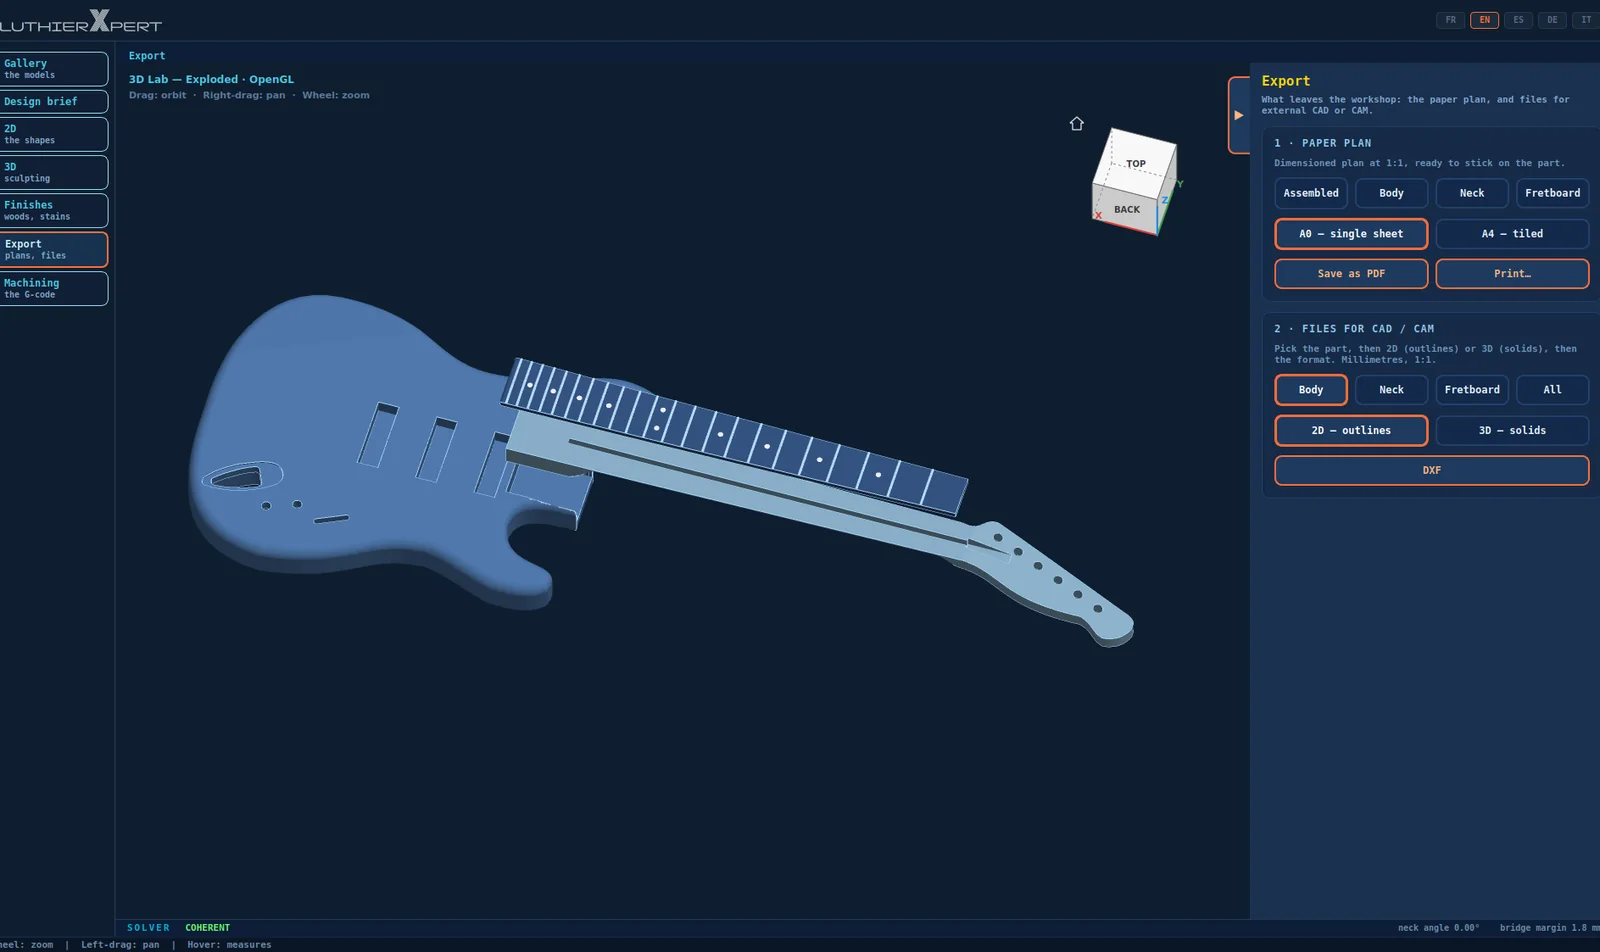
The paper plan comes out at 1:1, assembled or part by part. One A0 sheet, or A4s to tile. You print it or save it as PDF, then glue it onto the blank.

For external CAD or CAM, you pick the part, then 2D outlines or 3D solids. The files are in millimetres, at 1:1.

  • DXF for 2D outlines.
  • STL for meshes.
  • STEP for solids, part by part.
The Export page: the guitar in exploded view, the Paper plan panel and the Files for CAD / CAM panel.
Paper plan on A0 or tiled A4, 2D outlines or 3D solids part by part.

Machining — the G-code

From solid to G-code

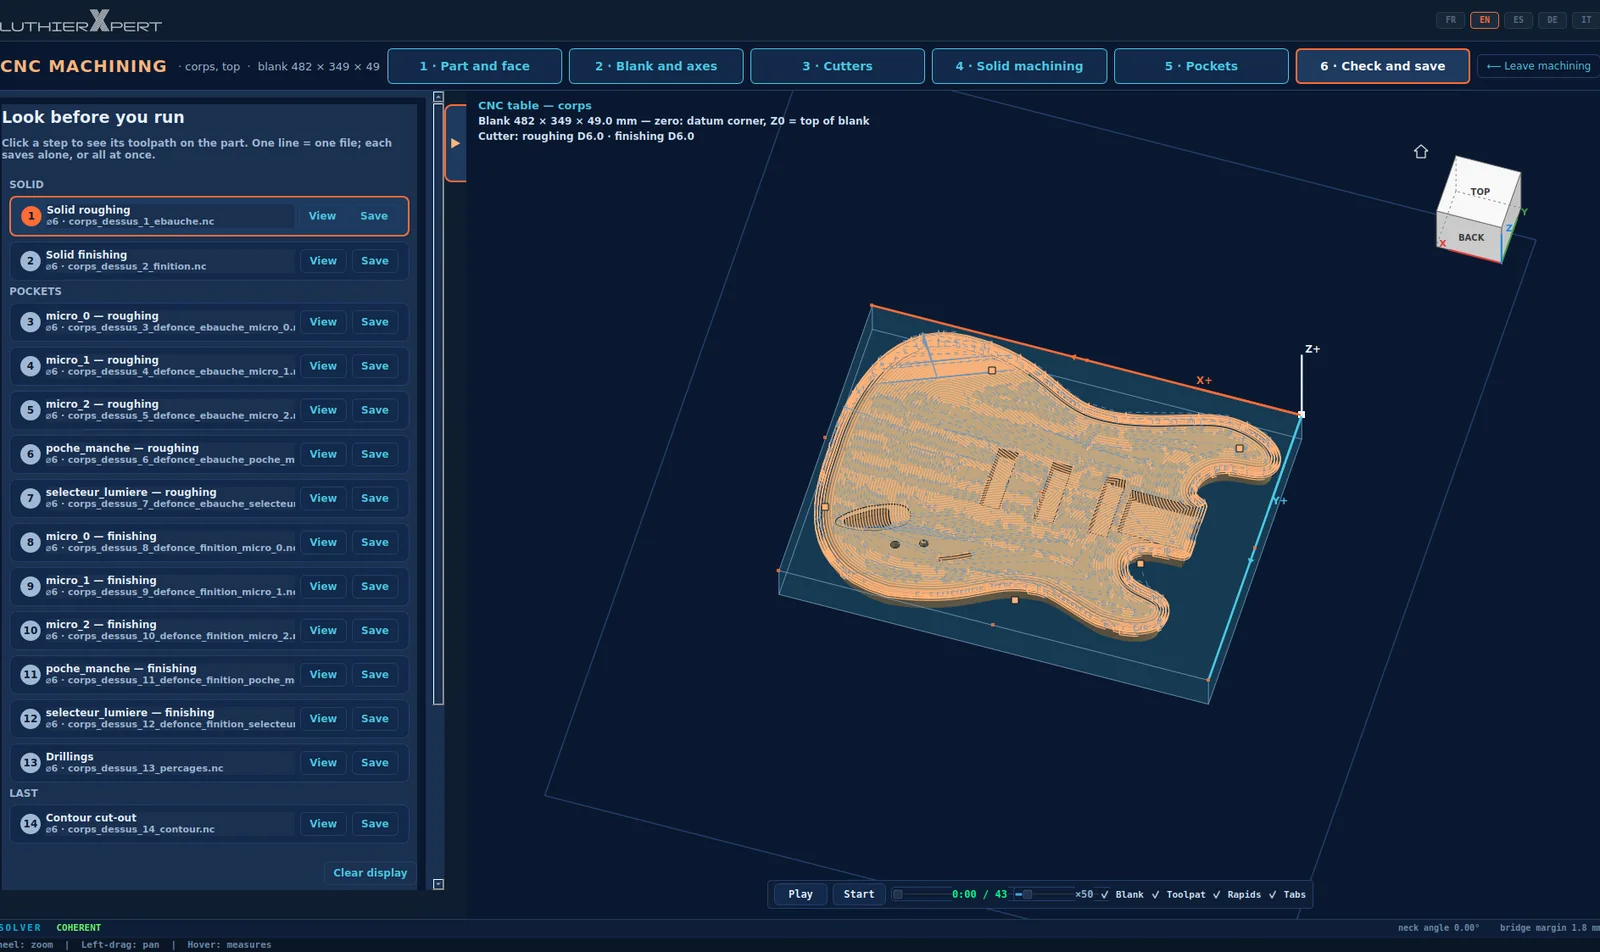
Machining runs over six screens: part and face, blank and axes, cutters, the solid, the pockets, then the check. Part zero is at the datum corner, Z0 on the top of the blank.

The solid comes out as three files: roughing, finishing, and the profile cut-out, which runs last. Each pocket has its own roughing and finishing. You replay every toolpath on screen before running it, sped up.

If a pocket is deeper than the usable length of the cutter, the software shows it in red before writing the file.

  • Body, neck and fretboard each have their own blank. The fret slots are cut on the fretboard.
  • One .nc file per step.
The CNC Machining page: the body in its blank on the table, with the list of files for the top face.
The body in its blank, and one file per step, the profile cut-out last.

Every edition opens the whole software

They differ in what comes out: paper plans, CAD files or G-code.

See pricing